Customize the Calendar of Events
Objective
This function was initially developed to display employees' birthdays and hiring dates. Afterwards, we added Document Management and reminders to facilitate collection work. Finally, some people use this option to inform users who created requisitions that their orders have been received, or to ensure that the due dates of various documents to be sent are respected.
Summary
Steps
Accessing the calendar
When maestro* starts
|
maestro* > Maintenance > General Maintenance > Processing > Security Management |
|
|
maestro* > Maintenance > General Maintenance > Processing > Security Management |

The calendar of events can be displayed by default when maestro* starts, after the company is selected.
To display the calendar of events automatically, you must change user security and check the Display the calendar of events after selecting the company option in the Access Restriction tab in the General - Miscellaneous section.
Manual start
To display the calendar of events, click on the Events Calendar icon in the tool bar of the main menu.
Configuring the display of the calendar
Given that users do not all use the same work methods, the display can be changed to suit the user.
To change the presentation of the calendar, simply click the Configuration icon in the calendar of events screen.
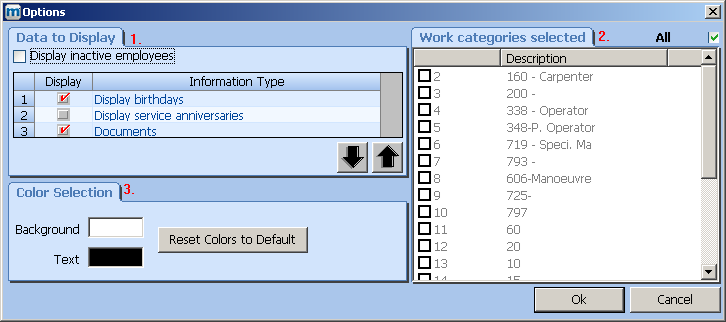
- The Data to display tab is used to define the information you want displayed in the calendar by selecting the items to be displayed.
- The Work categories selected tab is used to select the employment categories for which you want to see anniversaries and hiring dates. For example, you may decide that you only want to see dates for office employees rather than field employees that you only consult occasionally.
- The Color Selection tab lets you select background and text colours displayed in the calendar if an anniversary or document is assigned.
Assigning a document to a user to have it displayed in the calendar
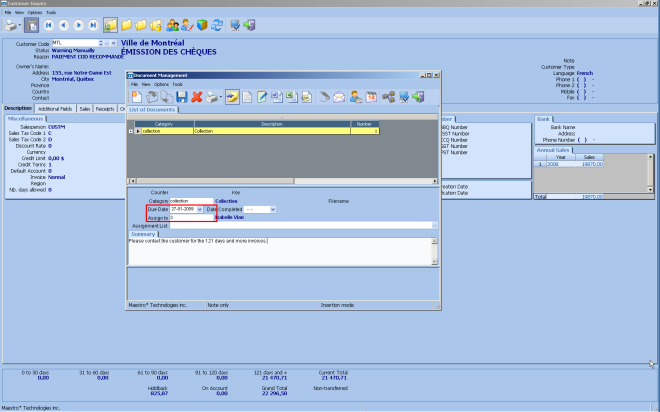
To display a document in the calendar, you must create it by clicking the Document Management icon available in most maestro* screens. You must specify to whom you want to assign it, as well as a reminder date.
In the example below, we will create a reminder note for collection purposes. In the Customer Inquiry screen, simply create a document in Word or a note. Specify a document category (to facilitate classification), a person to whom the document should be assigned and a reminder date.
After saving the note, on the date specified, the system displays a reminder that resembles the following:

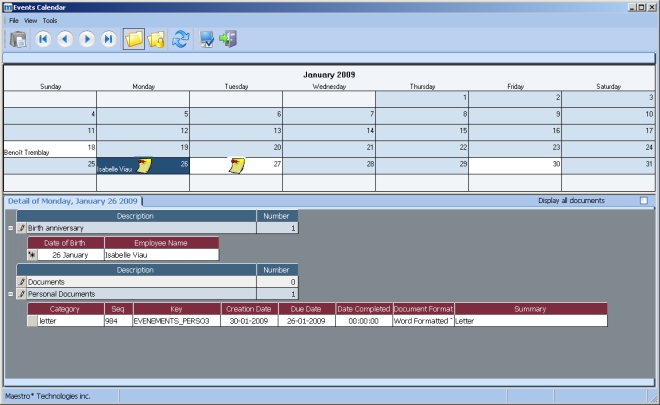
If you move the cursor to the date, the system displays documents with this date as the reminder date and assigned to your user at the bottom of the screen.
To display other documents that do not have a reminder date or one that differs from the date selected, you must check the Display all documents option in the calendar, below the calendar to the right.
To open or edit a document, double click on the document name. Be careful. If the document was created by another user and was assigned to you, an administrator must give you access to this option. In Security Management, in the Access Restrictions tab, Documents, Access to documents option the Can modify/delete documents created by other users option must be checked.
Send a message to notify about the receipt of merchandise
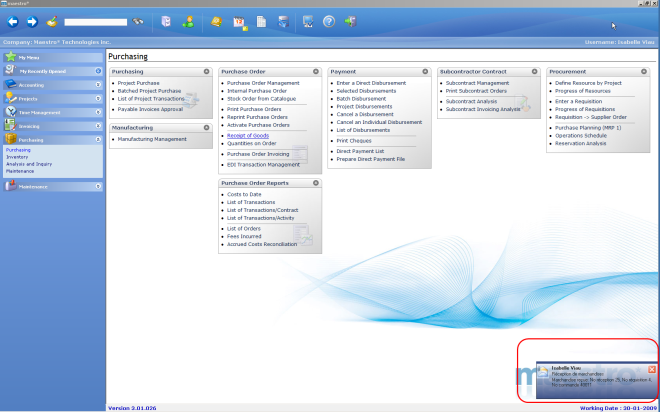
If you use requisitions, when merchandise is received, you can inform the person who requested the items. This note can then be displayed on the desktop (lower right) for a few seconds as long as the individual's calendar is running. The document can be viewed in the calendar.
To configure the notification, you must identify it in Configuration in the Purchasing module, Requisitions section Category of documents attached to receipts field. The Configuration option can be accessed by clicking the Configuration icon in the main menu.
Also, you must edit in Security Management, Access Restrictions tab, Purchasing – Requisitions section, Indicate how to requester user of a requisition must have a warning after a receipt of goods field, by selecting Send a message by e-mail and Save the document. The requesting user will receive a notification at the bottom of his or her screen if the calendar is running (see image below) and the user will also receive an e-mail message.
If the calendar is not running, the receiving document can be seen in the calendar of events if the Indicate how to requester user of... option is set to Send a message by e-mail and save the document and if the Display Documents option is checked in the calendar. It is very important to check this option because if it is not checked, it is impossible to see documents to your attention that were created by other users.
